
How to Make Tennis Highlight Clips From Match Footage
June 28, 2026
A good highlight reel is the most fun thing you can do with match footage — your best rallies, back to back, in a clip short enough to actually send to a friend or coach. The hard part isn’t the editing; it’s everything before it: digging your best points out of a two- or three-hour recording. Here’s how to go from raw match footage to a finished tennis highlight reel.
Start with the rallies, not the raw file
You can’t make highlights until you can see your points clearly, and a raw recording is mostly dead time — ball pickups, changeovers, breaks. So the first job is always to isolate the rallies. (If you haven’t done that yet, here’s how to cut the dead time out of a match video.)
Once you have clean, rally-by-rally clips, making a highlight reel comes down to two things: picking the best points and stitching them together.
Step by step
1. Get your footage onto your computer
Highlight editing is a desktop job — large video files belong on a computer, not a phone’s camera roll. Move your recording over (or record straight to a camera you offload to your PC).
2. Isolate every rally
Two ways to do this:
- By hand — scrub the timeline and trim each gap. Accurate, but slow across 100+ points.
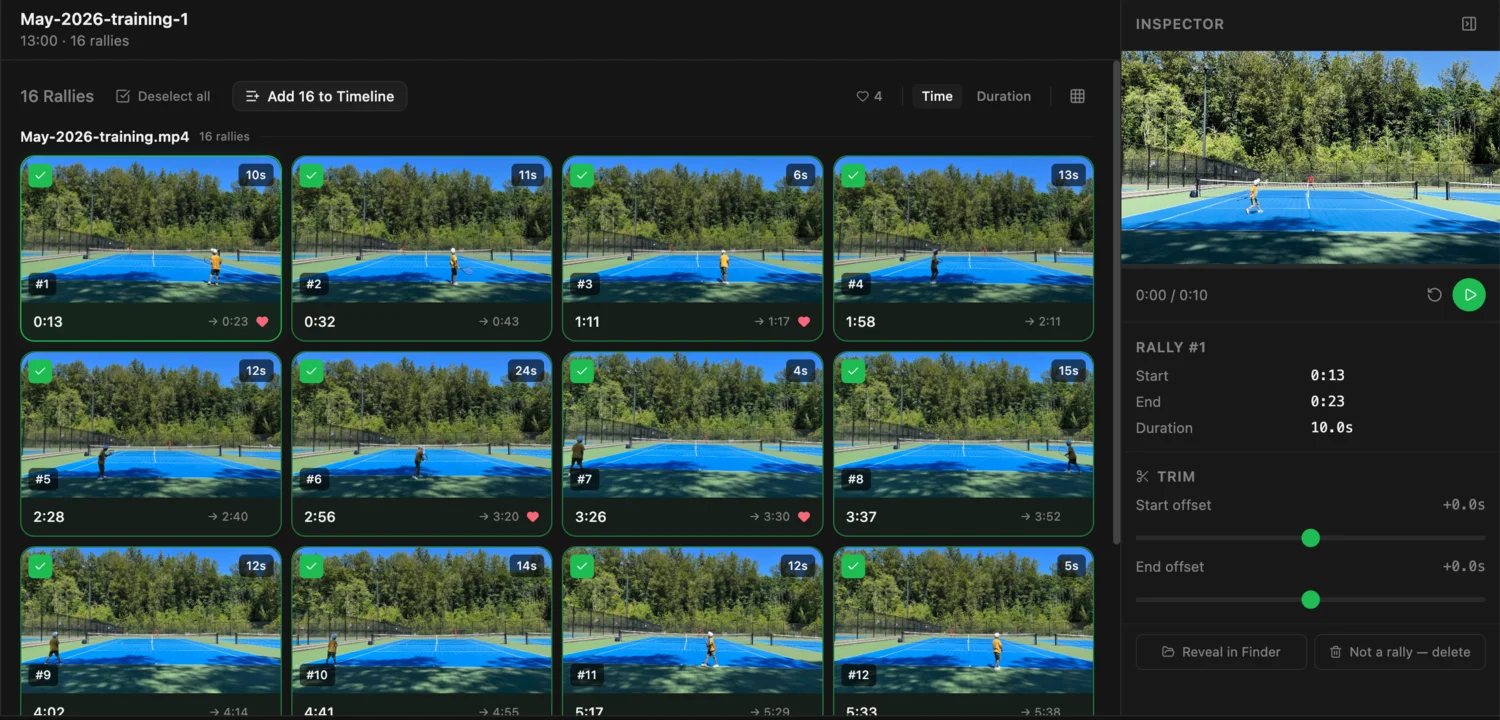
- Automatically — a tool that detects each rally for you. Rallytics finds every point and removes the dead time, leaving you clip-by-clip rallies to choose from. You can preview each detected rally and nudge its start or end if you want a tighter cut.
3. Pick your highlights
This is the creative part, and where a reel is won or lost. Go through the rallies and keep only the ones worth showing — the long baseline exchanges, the clean winners, the clutch points. In Rallytics you can mark the keepers as favorites as you watch, so your shortlist builds itself. Be ruthless: a 90-second reel of your best 8–10 points beats a 10-minute one that includes everything.
4. Assemble and export
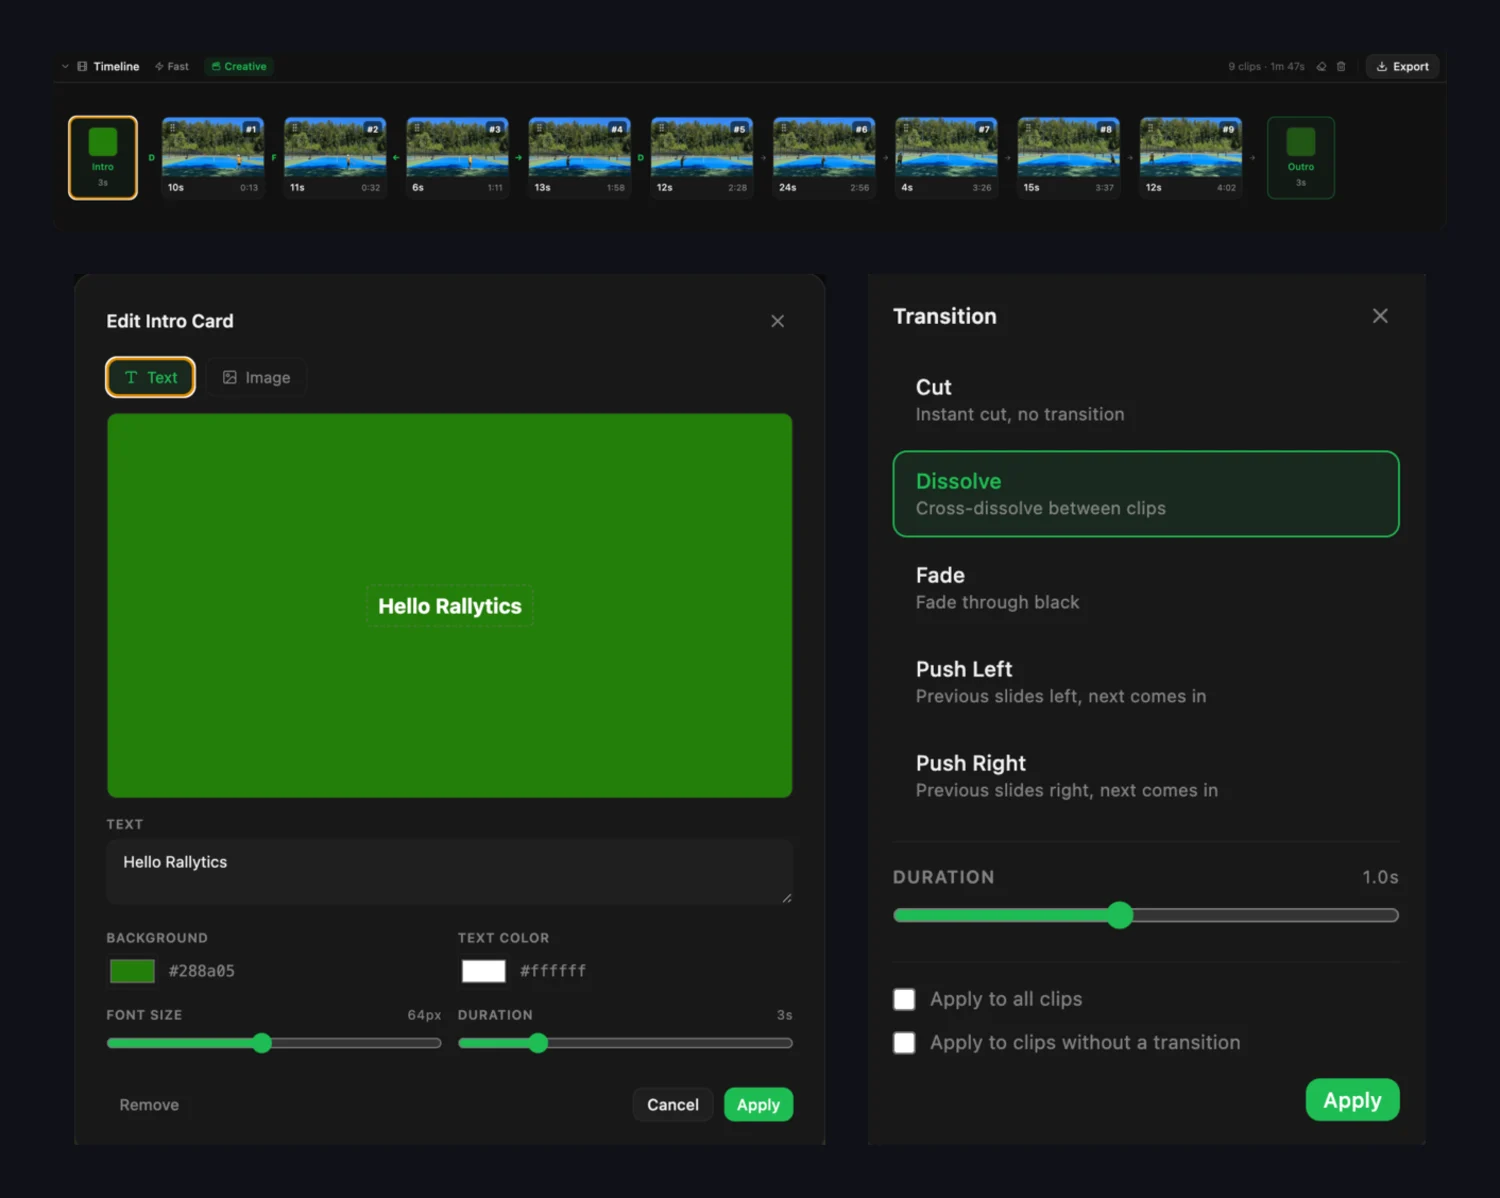
Put your chosen rallies in order and export. Lead with a strong point, keep the pace tight, and end on your best one. Rallytics gives you two ways to do it:
- Fast mode — stitches your selected rallies into a single clip quickly, no fuss.
- Creative mode — adds the finishing touches: a custom intro and outro, plus transitions between points, for a reel that looks the part.
Either way, it exports on your own computer — no re-uploading the whole match.
Tips for a reel people actually watch
- Keep it short. 60–120 seconds is plenty — quality over quantity.
- Lead with your best. Hook people with the first clip.
- Mix it up. A rally, a winner, a great defensive get — variety beats ten of the same point.
- Mind the angle, but don’t obsess. Points read best with the whole court in frame, but handheld and side-on footage works fine.
- Add music or titles last. Export the rally cut first, then drop it into any simple editor if you want a soundtrack.
The shortcut
Most of the work in a highlight reel is finding and trimming the points — and that’s exactly the part you can automate. With Rallytics, the rallies are detected for you, so you spend your time choosing the best ones instead of scrubbing a timeline. It’s a free download for Mac and Windows with a couple of hours of analysis included, so you can turn your next match into a highlight reel and see how it feels.